Idaho History Week 3: The Oregon Trail
Where would Idaho be without the Oregon Trail?This was a lot of fun.
We made covered wagons as an introduction to the lesson. Now many of the
students already knew about the Oregon trail and so it was really not
much more than a review. So here are the links for what we did.
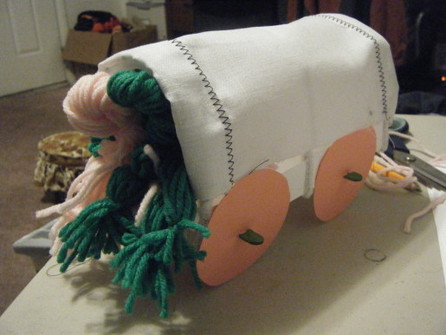
Wagon details: http://www.thecraftyclassroom.com/CraftPioneerWagon.html This was a bit different from what I planned. for the bottom of the wagon I took a piece of cardstock that measured 5 1/2″ x 8 1/2 “. I then scored each side at the one inch mark. I snipped one line on each corner so that I could fold in the tabs. This was a lot easier for a group of kids to do rather than the popsicle “skills” sticks. For the cover I also used something a bit different. I used a piece of clotton cloth that was durable like canvas–though not quite canvas. I folded it over at the top and bottom and sewed a pocket for yarn to be run through to tie it down. For wheels just used cardstock. (see picture below)
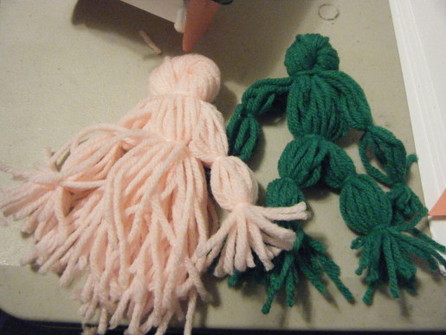
Ma and Pa are yarn dolls (pictured below) Instructions can be found here: http://www.thecraftyclassroom.com/CraftPioneerYarnDoll.html We did NOT do Ma and Pa during class this was only for my example of a wagon. One of the boys, much to my surprise, was really sad that we didn’t get to do them.
This took up most of our class time, But we did find time to cover the lapbooks I had already cut out and assembled–though we didn’t have time to glue it in. Here are the links to the lapbooks.
Oregon Trail Page
Idaho landmarks along the oregon Trail: I created this to simplify the landmarks in Idaho. www.lapbooklesssons has a blank template for this exact same thing. your child would then draw in the landmarks.
Vocabulary cards Front
Vocabulary cards Back
Vocabulary pocket--This makes a cute folder to place your cards in. I used a small square of velcro piece to hold the folder closed. I’m not sure where I found the folder and it is a tad bit short for the cards I made, but the kids thought it was fun that they stuck out.
This page is from ChildToChild.net though the site is no longer available. I have turned it into a PDF for ease of use. This is on some of the hardships that the pioneers faced. This is a drawing (could be writing if that’s their choice)
What did they take? This mini-book I created. I also have a typed answer on the page. Again I was dealing with time constraints. you do not have to use the typed answer.
Oregon Trail Map: I used the map from www.lapbooklessons.com. they have a great lapbook on the Oregon trail as well. you can pick and choose what you want/need.
We finished our lesson with a bit of hardtack and beef jerky. I made the hard tack using a very simple recipe and cheated by buying some jerky! Here is a pdf of the recipes though if you would like to try your hand at it.


